The Dexcom G6 Continuous Glucose Monitoring (CGM) system is a game-changer for those who struggle with diabetes. This is a step-by-step guide to quick start G6 sensor.
What is the G6 Sensor?
The G6 sensor is a part of the Dexcom CGM system, which continuously monitors your glucose levels day and night. The device offers real-time data with customizable alerts to ensure users make informed decisions in their diabetes management. The sensor eliminates routine finger pricks, making it convenient and accurate.
Step 1: Unpacking Your G6 Kit
Before you quick start G6 sensor, be sure to have the following in your kit:
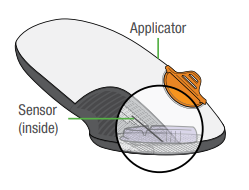
1.G6 sensor applicator.
Verify that all products are included and that the expiration date on the sensor pack has not expired.
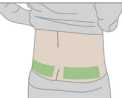
Step 2: Selection of Sensor Location
Ensure the sensor is placed in the appropriate location to optimize reading accuracy:
Adults should place the sensor on the abdomen, avoiding areas with scars, tattoos, or irritation.

- Clean the area with soap and water.
- Dry the skin completely.
- Sanitize the site with an alcohol wipe and let it dry to avoid irritation.
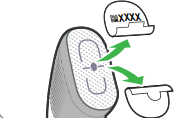
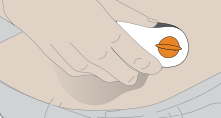
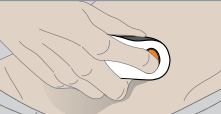
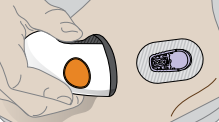
Step 3: Inserting the Sensor
The Dexcom G6 sensor applicator is made for simplicity. Follow these steps:
Remove the sensor applicator from its package.
Remove the adhesive backing.
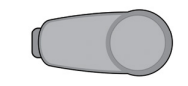
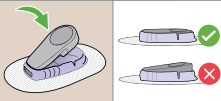
Step 4: Connect the Transmitter
The glucose data from the sensor flows to your device through a transmitter. To connect:
Snap the transmitter into the pod attached to the sensor so you hear two clicks
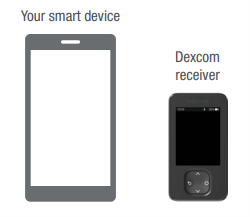
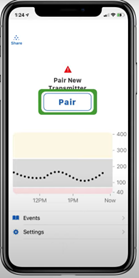
Step 5: Pair with Your Device
There are two ways to pair the transmitter with your smartphone or receiver that are Automatically and manually
For Smartphone:
- Download the Dexcom G6 app from Google Play or the App Store.
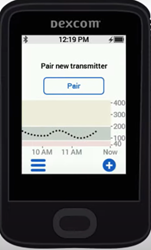
- To automatically pair a new transmitter from your phone, wait until you receive the pair new transmitter alert and then press pair
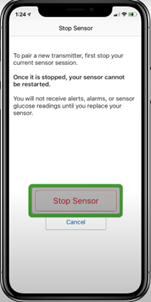
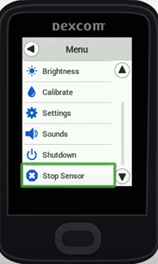
- To manually pair a new transmitter using your G6 app, stop your sensor within the setting option of your app, Settings > Transmitter > Pair New > Stop Sensor
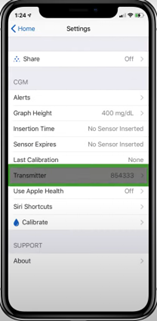
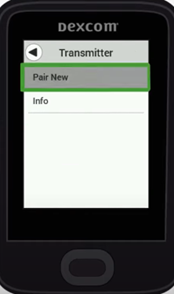
- Then tap transmitter
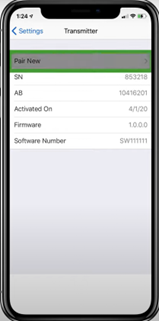
- Then select pair new, Settings > Transmitter > Pair New
- You will be prompted to stop your sensor if your current sensor is still active
- Fill in the serial number of your transmitter if prompted.
Using a Receiver:
Power on the receiver.
To automatically pair a new transmitter from your receiver wait until you get the pair new transmitter alert and then tap pair new
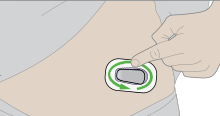
Step 6: Starting Your Sensor Session
- After successfully pairing, begin your sensor session by:
- Open your app or receiver and select “Start Sensor.”
Wait 2 hours, Glucose readings will not be available until the sensor has completed its warm-up phase.
Step 7: Calibrating Your Sensor
Another great thing about the G6 sensor is that it doesn’t need manual calibration. The factory calibration ensures the accuracy of reading without any fingerstick test.
Understanding Alerts and Notifications
Dexcom G6 enables you to configure alerts for high and low glucose levels. Get familiar with:
- Urgent Low Alarm: Informs you in case the glucose goes below 55 mg/dL.
- High Glucose Alarm: Informs you in case the glucose exceeds your set threshold.
- Rise/Fall Alerts: Indicates the potential for rapid glucose changes.
Calibrate the app or receiver settings to match your lifestyle and preferences.
Replacing the Sensor
Every G6 sensor lasts up to 10 days. Change according to the following instructions:
- Remove the old sensor. Gently peel it off from your skin.
- Dispose of it responsibly according to the rules of your local region.
- Insert and activate a new sensor using the steps above.
Troubleshooting Common Issues
- Lost Signal: Ensure the transmitter and device are within range (20 feet).
- Sensor Error: Restart the sensor session if prompted.
- Skin Irritation: Use barrier wipes before applying the sensor adhesive.
For persistent issues, contact Dexcom support.
Maximizing the Benefits of Your G6 Sensor
- Stay Hydrated: Proper hydration ensures accurate readings.
- Regularly Check Your Device: Monitor the app or receiver for data updates.
- Educate Yourself: Stay informed about updates to the Dexcom system.
Conclusion
The Dexcom G6 sensor offers unparalleled convenience and precision for diabetes management. With this quick start G6 sensor guide, you can efficiently configure your G6 sensor, and you will soon see the benefits of continuous glucose monitoring.
Stay proactive about your health and make the most of these cutting-edge technologies. If you encounter difficulties, refer to Dexcom’s official support resources for further guidance.